Database JSP Web Application Show Data Intellij Idea Glassfish and Mysql Java Connector
This tutorial requires intellij idea ultimate. Before proceeding any further please do the setups mentioned here https://quickgrid.blogspot.com/2016/10/Working-with-Database-PHP-MYSQL-Wampstack-Data-Show-on-Bootstrap-Table.html. Most of it isn't required but some of it is necessary for this tutorial.

Pressing on the run button should now open the web application in browser. If it does not work then go to run -> edit configuration . On the server tab choose domain1 as server domain.


First make a new folder named "lib" inside WEB-INF directory paste the mysql java connector jar file. Now run the web application with glassfish server and it will automatically open browser and show this table below. Before running replace index.jsp code with the code given below.


Creating a new project:
Go to file -> project -> java enterprise -> web application and click next. Give project name. Now on the left side in project tab go to web -> index.jsp . This file will contain code to get data from database and also bootstrap, jquery scripts.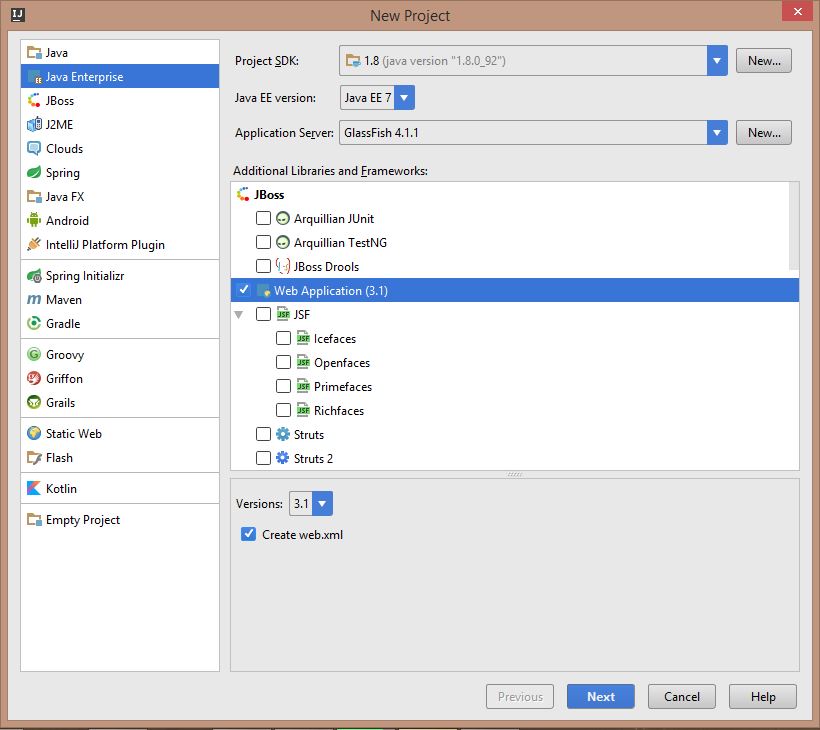
Download and setting up glassfish server:
Now the task is to set up glassfish server. First download glassfish server and unzip it to a folder. Go to file -> settings -> build, execution, development -> Application Server . Now click the + plus button and select glassfish server and locate the directory where glassfish server was unzipped.Pressing on the run button should now open the web application in browser. If it does not work then go to run -> edit configuration . On the server tab choose domain1 as server domain.

Connecting to Mysql console from intellij idea to perform queries:
Click on the database tab on the right side and press the + plus button. Now select data source -> mysql . It will show up like the picture below. Give your mysql username and password from the last tutorial. It could ask to download mysql database driver. Now test the connection. If everything is alright then it will show successful message.
Solving the big problem:
One of the biggest problem is jdbc class not found exception for the com.mysql.jdbc.driver. It will show internal error 500 with servelet exception. This can be solved by downloading and including mysql java connector. After downloading it, unzip it to a folder. The only required thing is the mysql java connector jar file.First make a new folder named "lib" inside WEB-INF directory paste the mysql java connector jar file. Now run the web application with glassfish server and it will automatically open browser and show this table below. Before running replace index.jsp code with the code given below.

index.jsp code:
Edit the username and password with your wamp stack mysql username and password. Also change database name to your database name. For table and data use them from the last tutorial.Output Table with data:

Comments